Thursday, February 28, 2013

Ma Po Tofu

Today was a snow day. Well not exactly; I worked from home, En took the day off to watch Alexis, and Alexis ran around the house. The storm dropped at least a foot of slush on the city which is worse than either rain or snow because slush is like liquid ice; it causes flooding, it is dense and backbreaking to shovel or walk through, and it is the perfect medium for hydroplaning. Our street was a river. The highways were flooded out. If it was En and I alone we would have battled our way in, but we couldn't bare to think of what could happen as we tried to get Alexis to and from my mother in law's.

So I had the ingredients in the fridge and figured this was the perfect day of the week to try this recipe. Believe it or not, I made it over my lunch (hour). Mind you, I prepped all the ingredients early in the morning, so by noon I was ready to go.

Ma Po Tofu is an iconic Szechuan dish which translates loosely to 'pockmarked face of grandmother' which is not a name fitting to its taste. It has become a favourite of ours after I got En to try some from a take out restaurant his family frequents. After that he was hooked! This is a much healthier version, of course, but what I did here was use actual black beans instead of the prepared black been sauce. Trust me, there is a difference in texture, and I'm writing the recipe below using the sauce, though the picture contains the actual black beans. Don't get me wrong - using actual black beans still made a very tasty dish, but it is not the same flavour or texture as the original dish, and to me transforms the dish too much from what it is intended to be.

Thinking ahead to prepare everything to make a bowl of comfort on a snowed-in-yet-working day is a wonderful mini escape that affords you that time of eating like it's the weekend. I prepped ingredients before the sun came up with a toddler running around my kitchen. I'm not saying to do this every day, but once in a while, it really is worth the effort. At least, that's what En and I thought as we relaxed on the couch with a bowl of Ma Po Tofu over Steamed Rice as we watched Alexis play on the living room floor.


Ma Po Tofu
Medium Tofu
1 pkg, drained, cubed 1/2"
Oyster Mushrooms
4 cups, sliced
Lean Ground Pork
2 lbs
Baby Bok Choi
6, shredded or minced
Green Onion
3 stalks, chopped
Onion
1 medium, minced
Garlic
5 cloves,  minced
Corn Starch
2 tbsp
Black Bean Sauce
4 tbsp
Hoisen Sauce
2 tbsp
Hot Bean Paste
2 tbsp
Crab Paste

1 tbsp
Soy Sauce
1 tbsp
Chilli Peppers
4 whole
Black Pepper
1 tsp, freshly cracked
Water
2 cups / 4 tbsp
Canola Oil
4 tbsp


Preparation:
  1. If tofu is easily broken to the touch, wrap it in cheesecloth/heavy kitchen paper and press it in a sieve for an hour.
  2. In a wok like pan, heat oil on medium and saute onions and garlic.
  3. When translucent, add mushrooms and stir.
  4. Once mushrooms have browned and reduced, add hot bean paste, black bean sauce, soy sauce, crab paste and hoisen sauce.
  5. Add the ground pork and brown. Step 4 and 5 are interchangeable, but I've found browning meat with the mushrooms lends a better flavour and the nature of the dish allows for the mushroom to cook down.
  6. Add the chilli peppers and cracked black pepper. Szechuan peppercorns are best and authentic, but if you don't have them on hand (and I don't), use fresh, good quality black peppercorns.
  7. Once meat has browned and begins to sizzle, add two cups of water. This shouldn't cover, but come about half way up the mixture.
  8. Cook for 10 minutes on medium heat. When it's ready the water has thickened slightly into a sauce.
  9. Add the tofu and stir.
  10. Add bok choi and stir. Bok choi is not authentic, but it gets some greens in to my diet, gives a nice freshness that deepens the mushroom flavour and that's just how I've done it.
  11. RLet the mixture simmer for another 10 minutes.
  12. Mix the cornstarch in the remaining four tbsp of cold water and stir vigorously into the pot.
  13. Let the mixture come to a boil for a minute (to activate the thickening of the corn starch) and then remove from heat.
  14. Stir and let rest covered for 10 minutes

Thursday, January 3, 2013

Slow Cooked Ribs in a Mushroom Gravy

Step 10: Close Up
Ribs are not a staple in my home or my mothers while we were growing up. We ate them, but it wasn't something we made, so when there were back ribs on sale at the local Asian grocery store they called out to my adventurous side. Maybe it was having all the usual during our holiday feasts. Maybe it was the yearning to try something new before I returned to work. Maybe it was wanting to use the new sautee pan my mom got me for Christmas. Maybe it was the need to cook En one really nice treat before I'm too busy with my job. For whatever reason, I picked them up and needed to figure out what to do with them. My mom's Doubleday Cookbook has a basic recipe for slow cooked ribs. I took it and modified it slightly to be a little more tasty.
Step 10: Simmering Ribs with Aromatics


Step 15: Gravy Returned to Pot

Step 15: Close Up

Ribs in Mushroom Gravy on Rice


Ribs in Mushroom Gravy
Beef Back Ribs
3 lbs, cut & cleaned
Mushrooms
4 cups, sliced
Onion
2, finely sliced
Carrot
1, chopped
Celery
1 stalk, chopped
Garlic
3 cloves, minced
Barley Flour
2 tbsp
Black Pepper
1 tsp, ground
Soy Sauce
2 tbsp
Fennel Seed
1 tsp, ground
Thyme
2 tsp
Bay Leaves

1
Vinegar
1 cup
Salt
1/4 cup
Water
to twice cover ribs
Canola Oil
4 tbsp


Preparation:
  1. Wash ribs
  2. Brine ribs in salt and vinegar solution diluted with only enough water to cover for 1-2 hours
  3. Rinse off ribs and set aside to dry
  4. In large saute pan, heat canola oil and sear meat over medium high heat and remove to a dish
  5. In the same pan, saute the mirpoix (onion, carrot, celery) until translucent
  6. Add the garlic, thyme, black pepper, fennel and bay leaf and half the mushrooms
  7. Return the ribs to the pan
  8. Add the soy sauce and stir all ingredients together
  9. Cook covered for 10 minutes on medium heat
  10. Add water to cover and bring to a boil
  11. Reduce heat to low and simmer covered for 1 1/2 hours
  12. Remove ribs and pour all other ingredients into a food processor
  13. Return ribs to pan
  14. Puree mixture in food processor until liquidized
  15. Return mixture to the pan and stir together with the ribs
  16. Sprinkle barley flour lightly over the entire pan and stir in thoroughly to avoid clumps (if you can't do this without clumping, add to food processor in step 12)
  17. Continue simmering on low for 1 hour
  18. Stir and let rest covered for 10 minutes

Thursday, December 27, 2012

Christmas Dinner At Our House

This year we hosted En's family for their Christmas Dinner which is held annually on Boxing Day. The time was drawing close and no one had offered to host, so in the spirit of the holidays to ensure tradition continued, we opened up our home to everyone.

Their family does Christmas in a potluck style which suited me just fine, because I was all cooked out. I tried to take pictures of everything, but as the arrival time of the food was staggered I missed the last few dishes, but they are listed below. This menu is typically representative of their Christmas meal, with the exception of the bird. There was no way in hell I was going to attempt a turkey for the first time completely solo the day after a full week of Christmas visiting and exhaustion.

What you are contributing:appetizers, snacks, desserts, vegetable entrée, meat entrée, carbs (rice/pasta/noodles/potatoes), alcohol*
Tio Rudy/ Tita Encar Richard/ Sharon Butch/ Thet Valerie/ Justin/ Paola Tito Dodong
Fried Calamari

Fried Pork Chop
Portuguese Chicken

Portuguese Rice

Portuguese Potatoes

Popeye's ChickenFilipino Spaghetti
 Biko (dessert)
 
What you are contributing:appetizers, snacks, desserts, vegetable entrée, meat entrée, carbs (rice/pasta/noodles/potatoes), alcohol*
Caesar/Grace Ash/Justin Uncle Boy/ Ante Digna En/ Mish Den/ Jev
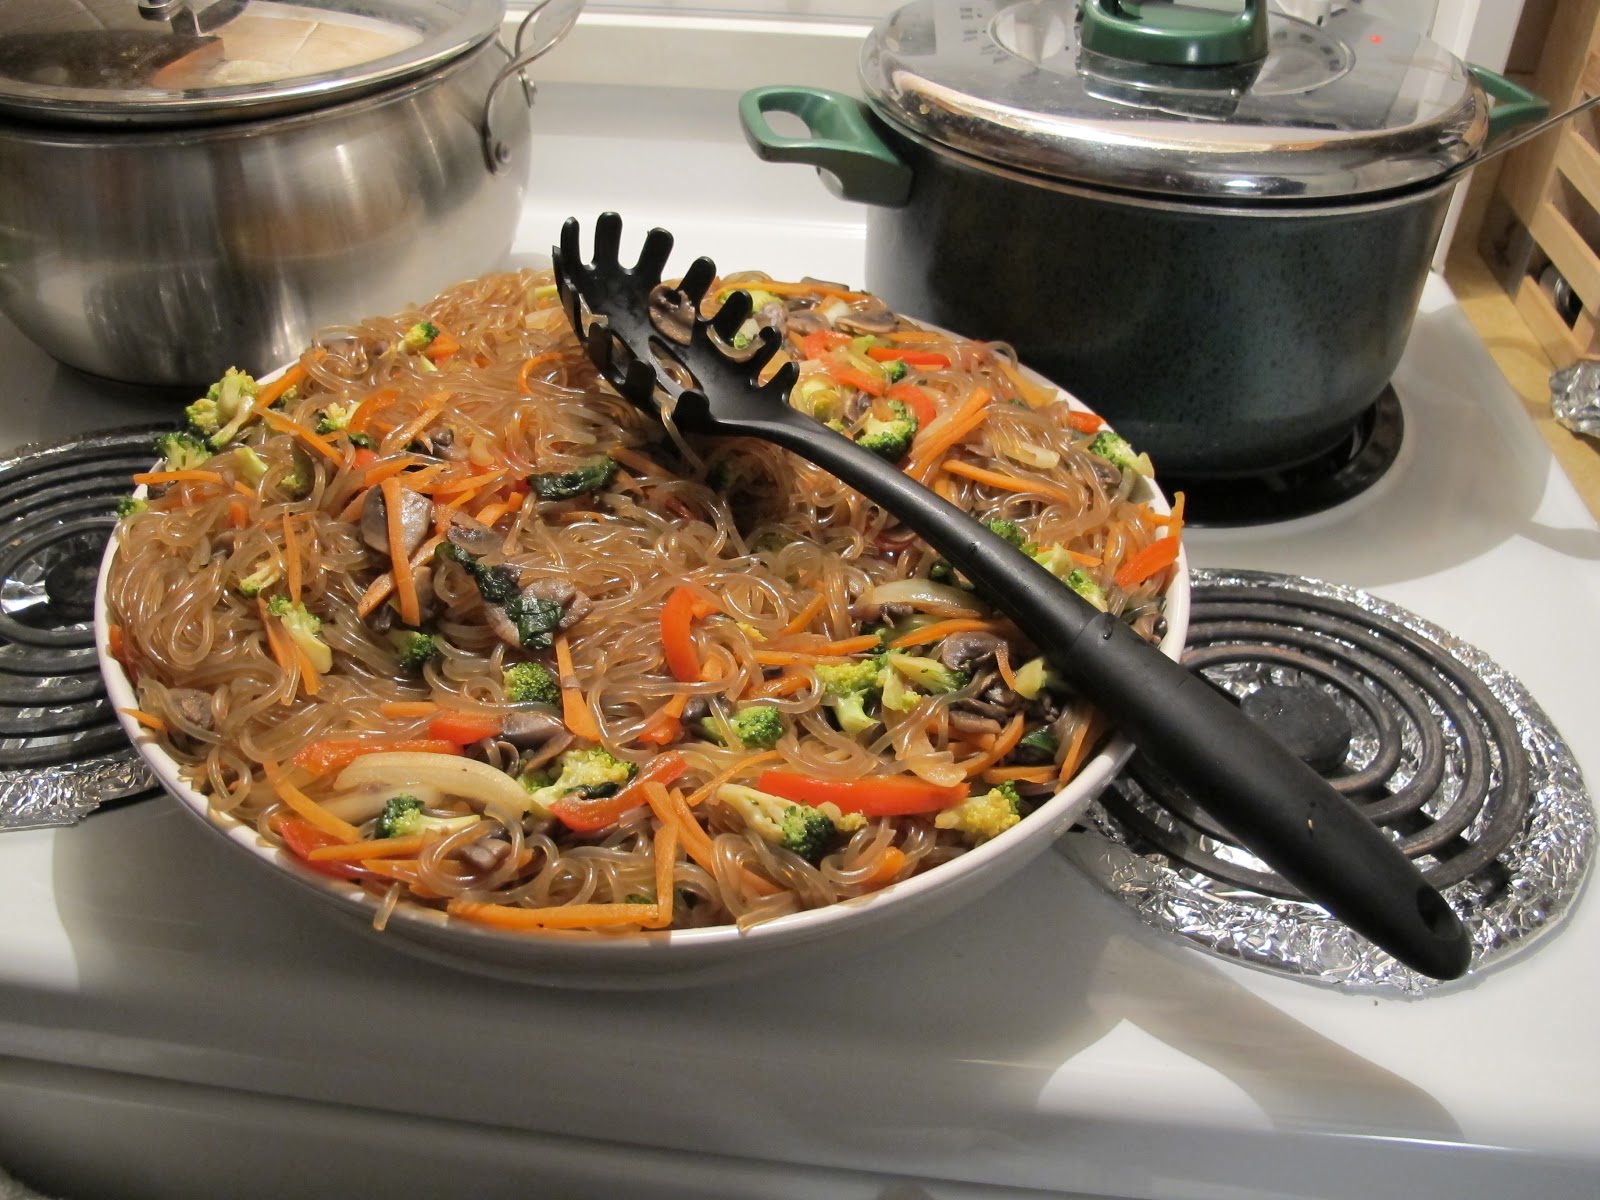
Korean vegetarian sweet potato noodles

Green Beans

Dessert Sqares
Rotinni Alfredo with Chicken and Spinach White Rice

Lumpia

Filipino Dessert Tray

Fruit salad

Fried Plantain
Beef Curry

Mash Potatoes

Dressed Salad

H'ors Douvres:
Olives, Cheese Salmon Cream Cheese, Sausage, Crackers

Pop & Bottled Water

MOM:
CheeseSandwiches
Baked Pasta
White Cake
Coffee Almond Ice Cream Torte

 
UNTENSILS  PERSONS RESPONSIBLE FOR BRINGING
Dinner plates En/ Mish
Dessert plates En/ Mish
Napkins En/ Mish
Utensils En/ Mish
Drinks (non-alcoholic) En/ Mish
Cups En/ Mish


Portuguese Chicken - courtesy of Sharon & Richard / Popeye's Chicken - courtesy of Butch & Theresa

Rice - courtesy of Ma / Lettuce and Carrot 'Roasted Red Pepper' Dressed Salad - courtesy of me

Pork & Ricotta Conchiglioni - courtesy of Mom / Steamed Garlic Green Beans - courtesy of Grace

Rotini Chicken Alfredo with Spinach - Justin B & Ashley

Vegetarian Glass Noodles - courtesy of Grace

Mash Potatoes - courtesy of me

Beef Curry - courtesy of me

Wednesday, December 12, 2012

Crab Curry

My favourite curry ever. Hands down.

If I have one pet peeve, it's when a dish is referred to as '...in a curry sauce.' Maybe in asian cuisines this is acceptable, but to me, an authentic curry of any cuisine (and this is an absolute for Caribbean curries) a curry is defined by the meat or vegetable cooked in it. The sauce of a curry is flavoured by that ingredient. You do not make the curry and then add the meat to it; you create the base for the sauce and add the meat, which helps to develop the flavour of the sauce. You cannot slap the sauce from a chicken curry on fish and call it fish curry. If a West Indian tastes the sauce and cannot tell you what kind of curry it comes from, they are not worth their weight.

My rant over, I will say that crab has a flavour that clings well to curry (probably oil soluble?) and is all around hearty while sweet at the same time. My husband doesn't prefer it for all the work required to get at the flesh, but to me, the best tasting foods need some effort put in to reap the delicious rewards.

Big Pot of Crab Curry for Easter Lunch


Crab Curry
Sri Lankan Sea Crab, or King Crab
2 lbs, on knuckle
Potato
5 large, peeled and cubed (1.5")
Onion
2 med onions, chopped
Garlic
6 cloves, minced
Tomato Paste
2 tbsp (heaped)
Coconut Milk
3/4 cup
Maririri Pepper
4 (depending on your heat preference)
Curry Powder (Sri Lankan)
6 tbsp
Cumin (parched)
3 tbsp (ground)
Turmeric
1 tbsp (ground)
Sea Salt
1 tsp
Canola Oil
2 tbsp


Preparation:
  1. Wash and clean crab legs in lemon water
  2. Pour canola oil into pot on med-high heat
  3. Saute onions and garlic until translucent
  4. Add tomato paste and stir until mixture is coated and paste begins to sizzle
  5. Add curry powder, cumin and turmeric
  6. Cook out all moisture until the paste begins to fry
  7. Add potatoes and stir to coat
  8. Cover and let cook on medium heat until partially cooked
  9. Add crab, increase heat to medium high and stir to coat
  10. When mixture barely begins to sizzle, add coconut milk
  11. Add enough just-boiled water to cover and stir briefly
  12. Add whole maririri peppers
  13. Partially cover and bring to a boil
  14. Reduce heat to medium, stir once, and let cook uncovered for approximately 20-30 minutes.
  15. Skim the fat continuously. I've said before: most people don't do this, but in our family we cook flavourful food as healthy as possible.
  16. Reduce heat to low for fifteen minutes and continue skimming fat
  17. Stir. The liquid will have turned to a thickened sauce. Turn off heat and remain covered until ready to serve. Traditionally, seafood and fish curries are served over rice, not roti.

Monday, December 10, 2012

Roast Pork Tenderloin with Button Mushrooms

Tenderloin is one of the healthiest cuts of meat you can eat. There are many ways to season the tenderloin for a variety of side pairings. I have four seasoning methods which can slightly vary but each are great bases from which to jump off into whatever creation you desire. With all seasonings, the longer it sits in the marinade, the better. This meal below paired well with mushrooms, which is a bonus for time saving, because you can toss it in the oven with the tenderloin and let the oven do the cooking. I'm sure time saving is the priority of every parent who is also responsible for providing a healthy dinner.

Rosemary Garlic Pork Tenderloin
Roasted Button Mushrooms


Provincial Seasoning
Garlic
4 cloves, minced
Rosemary
1 1/2 tbsp
Bay Leaf
1, ground
Sage
1 tsp, rubbed
White Wine Vinegar
2 tbsp
Black Pepper
1 tsp, ground
Sea Salt
1/2 tsp
Canola Oil
1 tbsp


Morrocan Seasoning
(I am aware of the irony in using an Arabic palate on swine)
Garlic
4 cloves, minced
Pomegranate Molasses
1 1/2 tbsp
Lemon Juice
1 lemon
Coriander
1 tbsp
Cloves
1 cloves ground
Cumin
1/2 tsp
Black Pepper
1 tsp, ground
Sea Salt
1/2 tsp
Olive Oil
1 btsp


Cantonese Seasoning
Garlic
4 cloves, minced
Sweet Red Wine Vinegar
2 tbsp
Shallot
2, minced
Star Anise
1, ground
Black Pepper
1 tsp, ground
Soy Sauce
1/2 tsp
Sesame Oil
1 tsp


Greek Seasoning
Garlic
4 cloves, minced
Lemon Juice
1 lemon
Lemon Zest
1 lemon
Plain Yogurt
1/4 cup
Bay Leaf
1, ground
Thyme
2 tbsp
Black Pepper
1 tsp, ground
Sea Salt
1/2 tsp
Olive Oil
1 tbsp


Roasted Button Mushrooms
Mushrooms

4 cups
Garlic
1 clove, minced
Thyme
1tbsp
Black Pepper
1 tsp, ground
Sea Salt
1/4 tsp
Olive Oil
1 tbsp


Tenderloin Preparation:
  1. Wash and trim tenderloin of silverskin
  2. Stab tenderloin repeatedly on all sides. Great stress reliever. Just don't catch your fingers in your enthusiasm. This step seems counter intuitive, but once the meat is cooked you will not notice the incisions, and making these slits will allow maximum flavour penetration, necessary for such a lean cut of meat.
  3. Rub tenderloin with seasoning, massaging in to all the slits
  4. Allow to sit in marinade for at least 1 hr (overnight in plastic bag with air removed is best)
  5. Allow tenderloin to come to room temperature
  6. Place on roasting rack and pour (or pat) remaining marinade on top of the tenderloin
  7. Set oven to 330F and roast uncovered for 20-25 minutes
  8. Remove from oven and tent for 10 minutes
  9. Carve into medallions when ready to serve

Mushroom Preparation:
  1. Wash and cut mushrooms into quarters or sixths
  2. Toss in remaining ingredients
  3. Empty into roasting tray
  4. Roast in oven on 330F for 20-25 minutes or until Mushrooms and juices sizzle

Monday, November 19, 2012

Hummus in a Hurry

I was hosting an event for En's birthday and had as much on my plate as I could handle, but when looking at the table, it needed something else. And what is both hearty and easy to make in a flash? Hummus.

I've done I've done the traditional  hummus before, but for some reason it takes me a long time and the consistancy is spotty until you add heaps of oil, and I just can't justify ingesting that much oil in one mouthful. To do the traditional hummus properly, you need to soak the chick peas from dry overnight with a touch of baking soda. This is the only way to produce the right consistency and great flavour. Using canned chick peas can still be done well, and after much tweaking, this version below insures each bite is yummy and smooth while still healthy if you choose to eat the whole tub.

Served with regular Breton crackers. It disappeared after two refills.


Hummus
Chick Peas
750 ml can
Onion
1, medium
Garlic
5 cloves
Olive Oil
1/2 cup
Lemon Zest
1 Lemon
Lemon Juice
1 Lemon
Tahini
4 tbs
Black Pepper
3 tsp (ground)
Smoked Paprika
2 tsp (ground)
Sea Salt
1 tsp (ground)
Water
1/4 cup

Canola Oil

2 tbsp


Garnish
Flat Leaf Parsley
Leaves, chopped


Preparation:
  1. Chop onion and mince garlic
  2. Heat a pot on medium with canola oil
  3. Add onion and stir
  4. After a few minutes, add garlic
  5. Saute until translucent
  6. Move mixture to sides of the pot and in the cleared middle, toast paprika and ground black pepper. Be very careful not to burn them! Pay attention to scent and colour.
  7. When toasted, stir mixture together
  8. Add chick peas and stir to coat
  9. Zest lemon directly into the pot
  10. Add Tahini
  11. Stir and allow to cook until mixture has softened
  12. When mositure has evaporated, add the water to loosen all the flavour on the bottom of the pan and also helps the mixture to soften further. This will give a creamy texture with flavour without watering it down
  13. When mixture has heated through and starts to thicken, add olive oil and lemon juice
  14. Remove pot from heat
  15. Add salt
  16. With a stick blender, blitz entire pot until creamy smooth. Add more olive oil (after blitzing) to loosen if necessary. Keep in mind - beating oil emulsifies, so always do this at the end.
  17. Refrigerates well for a few days, so good to make in advance if you're pressed for time

Saturday, November 10, 2012

Pork Curry

It was a funny thing I realized while speaking to my dear friend Genevieve on the phone. She called and I told her I was cooking. When she asked what I was making, I told her, and I could almost see her cringing up her nose. I realized then that pork curry is not something most Guyanese (or Trini's, for that matter) would ever cook, as most of them stay away from not only beef, but also pork. She said they just cook 'the usual' curries, which were chicken, goat, fish. The usual? By who's standards? And it hit me. These were things my father never had until he married my mother. My mother's family was from 'town' - the city, where there was a congregation of race, religion, and altogether more culturally 'melted' than the rural areas where most others lived. To live in the city was to be more open to what your neighbours were doing and eating. And hence, we eat pork curry. When I told Genny 'come on, you know you can curry anything', she replied 'yes, but not everything curried tastes good!' She's right, but pork is definitely not one of those things. It is so delicious. Here is how to make it.

Image 1: The meat itself gives off much liquid.
This must all cook off before additional ingredients are added.

Image 2: A Maririri pepper - I'm unsure of the proper, English name,
but this is the typical Guyanese pepper used in cooking and pepper sauces.
I added four to this pot.

Image 3: After adding the potato and water - it should just cover the contents.
This shot captures the curry at a rolling boil.

Image 4: The completed curry ready to serve.


Pork Curry


Pork Loins
2, 1" cubes
Potato
Peeled & 1.5" cubes
Onion
2 med onions, chopped
Garlic
6 cloves, minced
Tomato Paste
2 tbsp (heaped)
Maririri Pepper
0-4 (depending on your heat preference)
Curry Powder
6 tbsp
Cumin (parched)
3 tbsp (ground)
Turmeric
1 tbsp (ground)
Sea Salt
1 tsp
Canola Oil
2 tbsp


Preparation:
  1. Wash and trim pork and cut into 1" cubes
  2. Pour canola oil into pot on med-high heat
  3. Saute onions and garlic until translucent
  4. Add tomato paste and stir until mixture is coated and paste begins to sizzle
  5. Add curry powder, cumin and turmeric
  6. Cook out all moisture until the paste begins to fry
  7. Add pork and stir to coat and then leave to brown
  8. Juices will release. It will seem like a lot of liquid (see image 1), but rest assured, it will all evaporate. It will take a long time and require occasional stirring, but do not skip this step and do not continue before the meat itself begins to fry after all the liquid has disappeared. Doing so will result in a bland, one note dish. I say this for all curries. Do not skip this step.
  9. When the meat has caramelized, add potato and enough just-boiled water to cover and stir (see image 2).
  10. When finished stirring, add your whole maririri peppers (see image 3). Partially cover and bring to a boil.
  11. Reduce heat to medium, stir, and let cook uncovered for approximately 20-30 minutes.
  12. Skim the fat continuously. Most people don't do this, but in our family we cook as healthy as possible and with the constant skimming, up to half a cup of fat can be removed.
  13. Reduce heat to low for fifteen minutes and continue skimming fat.
  14. Stir. The liquid will have turned to a thickened sauce (see image 4). To thicken sauce further, my mother taught me a trick - smash a few of the potatoes in the pot against the side and stir into the curry. Turn off heat and remain covered until ready to serve over steamed rice.
 
Copyright 2009 Lime & Wine. Powered by Blogger Blogger Templates create by Deluxe Templates. WP by Masterplan