Thursday, December 27, 2012

Christmas Dinner At Our House

This year we hosted En's family for their Christmas Dinner which is held annually on Boxing Day. The time was drawing close and no one had offered to host, so in the spirit of the holidays to ensure tradition continued, we opened up our home to everyone.

Their family does Christmas in a potluck style which suited me just fine, because I was all cooked out. I tried to take pictures of everything, but as the arrival time of the food was staggered I missed the last few dishes, but they are listed below. This menu is typically representative of their Christmas meal, with the exception of the bird. There was no way in hell I was going to attempt a turkey for the first time completely solo the day after a full week of Christmas visiting and exhaustion.

What you are contributing:appetizers, snacks, desserts, vegetable entrée, meat entrée, carbs (rice/pasta/noodles/potatoes), alcohol*
Tio Rudy/ Tita Encar Richard/ Sharon Butch/ Thet Valerie/ Justin/ Paola Tito Dodong
Fried Calamari

Fried Pork Chop
Portuguese Chicken

Portuguese Rice

Portuguese Potatoes

Popeye's ChickenFilipino Spaghetti
 Biko (dessert)
 
What you are contributing:appetizers, snacks, desserts, vegetable entrée, meat entrée, carbs (rice/pasta/noodles/potatoes), alcohol*
Caesar/Grace Ash/Justin Uncle Boy/ Ante Digna En/ Mish Den/ Jev
Korean vegetarian sweet potato noodles

Green Beans

Dessert Sqares
Rotinni Alfredo with Chicken and Spinach White Rice

Lumpia

Filipino Dessert Tray

Fruit salad

Fried Plantain
Beef Curry

Mash Potatoes

Dressed Salad

H'ors Douvres:
Olives, Cheese Salmon Cream Cheese, Sausage, Crackers

Pop & Bottled Water

MOM:
CheeseSandwiches
Baked Pasta
White Cake
Coffee Almond Ice Cream Torte

 
UNTENSILS  PERSONS RESPONSIBLE FOR BRINGING
Dinner plates En/ Mish
Dessert plates En/ Mish
Napkins En/ Mish
Utensils En/ Mish
Drinks (non-alcoholic) En/ Mish
Cups En/ Mish


Portuguese Chicken - courtesy of Sharon & Richard / Popeye's Chicken - courtesy of Butch & Theresa

Rice - courtesy of Ma / Lettuce and Carrot 'Roasted Red Pepper' Dressed Salad - courtesy of me

Pork & Ricotta Conchiglioni - courtesy of Mom / Steamed Garlic Green Beans - courtesy of Grace

Rotini Chicken Alfredo with Spinach - Justin B & Ashley

Vegetarian Glass Noodles - courtesy of Grace

Mash Potatoes - courtesy of me

Beef Curry - courtesy of me

Wednesday, December 12, 2012

Crab Curry

My favourite curry ever. Hands down.

If I have one pet peeve, it's when a dish is referred to as '...in a curry sauce.' Maybe in asian cuisines this is acceptable, but to me, an authentic curry of any cuisine (and this is an absolute for Caribbean curries) a curry is defined by the meat or vegetable cooked in it. The sauce of a curry is flavoured by that ingredient. You do not make the curry and then add the meat to it; you create the base for the sauce and add the meat, which helps to develop the flavour of the sauce. You cannot slap the sauce from a chicken curry on fish and call it fish curry. If a West Indian tastes the sauce and cannot tell you what kind of curry it comes from, they are not worth their weight.

My rant over, I will say that crab has a flavour that clings well to curry (probably oil soluble?) and is all around hearty while sweet at the same time. My husband doesn't prefer it for all the work required to get at the flesh, but to me, the best tasting foods need some effort put in to reap the delicious rewards.

Big Pot of Crab Curry for Easter Lunch


Crab Curry
Sri Lankan Sea Crab, or King Crab
2 lbs, on knuckle
Potato
5 large, peeled and cubed (1.5")
Onion
2 med onions, chopped
Garlic
6 cloves, minced
Tomato Paste
2 tbsp (heaped)
Coconut Milk
3/4 cup
Maririri Pepper
4 (depending on your heat preference)
Curry Powder (Sri Lankan)
6 tbsp
Cumin (parched)
3 tbsp (ground)
Turmeric
1 tbsp (ground)
Sea Salt
1 tsp
Canola Oil
2 tbsp


Preparation:
  1. Wash and clean crab legs in lemon water
  2. Pour canola oil into pot on med-high heat
  3. Saute onions and garlic until translucent
  4. Add tomato paste and stir until mixture is coated and paste begins to sizzle
  5. Add curry powder, cumin and turmeric
  6. Cook out all moisture until the paste begins to fry
  7. Add potatoes and stir to coat
  8. Cover and let cook on medium heat until partially cooked
  9. Add crab, increase heat to medium high and stir to coat
  10. When mixture barely begins to sizzle, add coconut milk
  11. Add enough just-boiled water to cover and stir briefly
  12. Add whole maririri peppers
  13. Partially cover and bring to a boil
  14. Reduce heat to medium, stir once, and let cook uncovered for approximately 20-30 minutes.
  15. Skim the fat continuously. I've said before: most people don't do this, but in our family we cook flavourful food as healthy as possible.
  16. Reduce heat to low for fifteen minutes and continue skimming fat
  17. Stir. The liquid will have turned to a thickened sauce. Turn off heat and remain covered until ready to serve. Traditionally, seafood and fish curries are served over rice, not roti.

Monday, December 10, 2012

Roast Pork Tenderloin with Button Mushrooms

Tenderloin is one of the healthiest cuts of meat you can eat. There are many ways to season the tenderloin for a variety of side pairings. I have four seasoning methods which can slightly vary but each are great bases from which to jump off into whatever creation you desire. With all seasonings, the longer it sits in the marinade, the better. This meal below paired well with mushrooms, which is a bonus for time saving, because you can toss it in the oven with the tenderloin and let the oven do the cooking. I'm sure time saving is the priority of every parent who is also responsible for providing a healthy dinner.

Rosemary Garlic Pork Tenderloin
Roasted Button Mushrooms


Provincial Seasoning
Garlic
4 cloves, minced
Rosemary
1 1/2 tbsp
Bay Leaf
1, ground
Sage
1 tsp, rubbed
White Wine Vinegar
2 tbsp
Black Pepper
1 tsp, ground
Sea Salt
1/2 tsp
Canola Oil
1 tbsp


Morrocan Seasoning
(I am aware of the irony in using an Arabic palate on swine)
Garlic
4 cloves, minced
Pomegranate Molasses
1 1/2 tbsp
Lemon Juice
1 lemon
Coriander
1 tbsp
Cloves
1 cloves ground
Cumin
1/2 tsp
Black Pepper
1 tsp, ground
Sea Salt
1/2 tsp
Olive Oil
1 btsp


Cantonese Seasoning
Garlic
4 cloves, minced
Sweet Red Wine Vinegar
2 tbsp
Shallot
2, minced
Star Anise
1, ground
Black Pepper
1 tsp, ground
Soy Sauce
1/2 tsp
Sesame Oil
1 tsp


Greek Seasoning
Garlic
4 cloves, minced
Lemon Juice
1 lemon
Lemon Zest
1 lemon
Plain Yogurt
1/4 cup
Bay Leaf
1, ground
Thyme
2 tbsp
Black Pepper
1 tsp, ground
Sea Salt
1/2 tsp
Olive Oil
1 tbsp


Roasted Button Mushrooms
Mushrooms

4 cups
Garlic
1 clove, minced
Thyme
1tbsp
Black Pepper
1 tsp, ground
Sea Salt
1/4 tsp
Olive Oil
1 tbsp


Tenderloin Preparation:
  1. Wash and trim tenderloin of silverskin
  2. Stab tenderloin repeatedly on all sides. Great stress reliever. Just don't catch your fingers in your enthusiasm. This step seems counter intuitive, but once the meat is cooked you will not notice the incisions, and making these slits will allow maximum flavour penetration, necessary for such a lean cut of meat.
  3. Rub tenderloin with seasoning, massaging in to all the slits
  4. Allow to sit in marinade for at least 1 hr (overnight in plastic bag with air removed is best)
  5. Allow tenderloin to come to room temperature
  6. Place on roasting rack and pour (or pat) remaining marinade on top of the tenderloin
  7. Set oven to 330F and roast uncovered for 20-25 minutes
  8. Remove from oven and tent for 10 minutes
  9. Carve into medallions when ready to serve

Mushroom Preparation:
  1. Wash and cut mushrooms into quarters or sixths
  2. Toss in remaining ingredients
  3. Empty into roasting tray
  4. Roast in oven on 330F for 20-25 minutes or until Mushrooms and juices sizzle

Monday, November 19, 2012

Hummus in a Hurry

I was hosting an event for En's birthday and had as much on my plate as I could handle, but when looking at the table, it needed something else. And what is both hearty and easy to make in a flash? Hummus.

I've done I've done the traditional  hummus before, but for some reason it takes me a long time and the consistancy is spotty until you add heaps of oil, and I just can't justify ingesting that much oil in one mouthful. To do the traditional hummus properly, you need to soak the chick peas from dry overnight with a touch of baking soda. This is the only way to produce the right consistency and great flavour. Using canned chick peas can still be done well, and after much tweaking, this version below insures each bite is yummy and smooth while still healthy if you choose to eat the whole tub.

Served with regular Breton crackers. It disappeared after two refills.


Hummus
Chick Peas
750 ml can
Onion
1, medium
Garlic
5 cloves
Olive Oil
1/2 cup
Lemon Zest
1 Lemon
Lemon Juice
1 Lemon
Tahini
4 tbs
Black Pepper
3 tsp (ground)
Smoked Paprika
2 tsp (ground)
Sea Salt
1 tsp (ground)
Water
1/4 cup

Canola Oil

2 tbsp


Garnish
Flat Leaf Parsley
Leaves, chopped


Preparation:
  1. Chop onion and mince garlic
  2. Heat a pot on medium with canola oil
  3. Add onion and stir
  4. After a few minutes, add garlic
  5. Saute until translucent
  6. Move mixture to sides of the pot and in the cleared middle, toast paprika and ground black pepper. Be very careful not to burn them! Pay attention to scent and colour.
  7. When toasted, stir mixture together
  8. Add chick peas and stir to coat
  9. Zest lemon directly into the pot
  10. Add Tahini
  11. Stir and allow to cook until mixture has softened
  12. When mositure has evaporated, add the water to loosen all the flavour on the bottom of the pan and also helps the mixture to soften further. This will give a creamy texture with flavour without watering it down
  13. When mixture has heated through and starts to thicken, add olive oil and lemon juice
  14. Remove pot from heat
  15. Add salt
  16. With a stick blender, blitz entire pot until creamy smooth. Add more olive oil (after blitzing) to loosen if necessary. Keep in mind - beating oil emulsifies, so always do this at the end.
  17. Refrigerates well for a few days, so good to make in advance if you're pressed for time

Saturday, November 10, 2012

Pork Curry

It was a funny thing I realized while speaking to my dear friend Genevieve on the phone. She called and I told her I was cooking. When she asked what I was making, I told her, and I could almost see her cringing up her nose. I realized then that pork curry is not something most Guyanese (or Trini's, for that matter) would ever cook, as most of them stay away from not only beef, but also pork. She said they just cook 'the usual' curries, which were chicken, goat, fish. The usual? By who's standards? And it hit me. These were things my father never had until he married my mother. My mother's family was from 'town' - the city, where there was a congregation of race, religion, and altogether more culturally 'melted' than the rural areas where most others lived. To live in the city was to be more open to what your neighbours were doing and eating. And hence, we eat pork curry. When I told Genny 'come on, you know you can curry anything', she replied 'yes, but not everything curried tastes good!' She's right, but pork is definitely not one of those things. It is so delicious. Here is how to make it.

Image 1: The meat itself gives off much liquid.
This must all cook off before additional ingredients are added.

Image 2: A Maririri pepper - I'm unsure of the proper, English name,
but this is the typical Guyanese pepper used in cooking and pepper sauces.
I added four to this pot.

Image 3: After adding the potato and water - it should just cover the contents.
This shot captures the curry at a rolling boil.

Image 4: The completed curry ready to serve.


Pork Curry


Pork Loins
2, 1" cubes
Potato
Peeled & 1.5" cubes
Onion
2 med onions, chopped
Garlic
6 cloves, minced
Tomato Paste
2 tbsp (heaped)
Maririri Pepper
0-4 (depending on your heat preference)
Curry Powder
6 tbsp
Cumin (parched)
3 tbsp (ground)
Turmeric
1 tbsp (ground)
Sea Salt
1 tsp
Canola Oil
2 tbsp


Preparation:
  1. Wash and trim pork and cut into 1" cubes
  2. Pour canola oil into pot on med-high heat
  3. Saute onions and garlic until translucent
  4. Add tomato paste and stir until mixture is coated and paste begins to sizzle
  5. Add curry powder, cumin and turmeric
  6. Cook out all moisture until the paste begins to fry
  7. Add pork and stir to coat and then leave to brown
  8. Juices will release. It will seem like a lot of liquid (see image 1), but rest assured, it will all evaporate. It will take a long time and require occasional stirring, but do not skip this step and do not continue before the meat itself begins to fry after all the liquid has disappeared. Doing so will result in a bland, one note dish. I say this for all curries. Do not skip this step.
  9. When the meat has caramelized, add potato and enough just-boiled water to cover and stir (see image 2).
  10. When finished stirring, add your whole maririri peppers (see image 3). Partially cover and bring to a boil.
  11. Reduce heat to medium, stir, and let cook uncovered for approximately 20-30 minutes.
  12. Skim the fat continuously. Most people don't do this, but in our family we cook as healthy as possible and with the constant skimming, up to half a cup of fat can be removed.
  13. Reduce heat to low for fifteen minutes and continue skimming fat.
  14. Stir. The liquid will have turned to a thickened sauce (see image 4). To thicken sauce further, my mother taught me a trick - smash a few of the potatoes in the pot against the side and stir into the curry. Turn off heat and remain covered until ready to serve over steamed rice.

Wednesday, November 7, 2012

Magic Wok

Image Courtesy of Google Maps
I know it sounds like a generic chain, but hear me out. This restaurant is my family's go to restaurant for birthday celebrations for years. It is NOT the toned down, fried, made for the meat-and-potatoes-palate kind of food. It's at the other end of the spectrum. There are meats and fungi on the menu that most Canadians wouldn't dream of touching, but they are delicious if you know how to prepare it right. And boy, can they prepare it right here.

That being said, we've never tended to stray from our usual order. We may try a new dish here or there, but the reason we choose the same things is because they are so good, we all have our favourites, and nobody want's to give up what they like. Except for dad and mom. Which means it really is just the three of us who will never compromise. On top of our orders, we all (except for dad) order a dish of steamed rice to go with our food.

And now we have Mark, so I'm sure soon we will have an additional dish added to our repertoire. Maybe our desire to insist it is closer to 'authentic' than 'Americanized' is the reason we refer to the place as '14th line; the location rather than the name.

Magic Wok is located on 14th Ave west of Kennedy in Markham, right beside the Mandir En and I got married in. I'm not sure about lunch, but they open for dinner service at 5.00pm.

Steamed Pickerel with Ginger and Green Onion
From Bottom Clockwise: Chicken Hot Pot, Cantonese Chow Mien,
Black Bean Lobster, Chicken Fried Rice, Baby Bok Choi
Dad's Selection: 
Baby Bok Choi in Garlic. This is a great and healthy side for all the rich meat dishes. Crisp yet delicious, we always finish the entire platter.

Mom's Selection: 
Beef Brisket Hot Plate in Sauce. It spits sauce everywhere from the sizzling hot iron platter and leaves a red ring on the tablecloth around the dish once you lift it. We didn't order it this time because of the XM processing plant bacteria scare, but it suits me fine as Diwali is coming up and I've chosen to fast off of beef for the proceeding month. But it is yummy! I need to remember what sauce we order, but it is covered in a red, almost barbeque consistency, but with far more tang. The meat is so tender and is loaded with onions - wonderful with the steamed rice.

Cher's Selection: 
Lobster in Black Bean Sauce. If she doesn't order it, I will. It's so good. The key to it is to eat it as soon as you can, since cold lobster is gross. They serve all pieces, even if it's just shell, but I have to say, even sucking the sauce off the shell alone is tasty, and I do this, regardless of who may be watching and judging. It's good food. Deal with it. And yes, I crunch up the shells and crack them with my teeth.

My Selection: 
Steamed Pickerel with Ginger and Green Onion. If they don't have fresh pickerel, I'll settle for grouper. The entire fish is steamed and then finished off with some sizzling oil drizzled overtop. Dad has always saved the cheeks for me and Cher, but soon that tradition will change once Alexis is old enough to eat solids!

En's Selection: 
Cantonese Chow Mein. It may sound generic, and my husband prefers the mainstream dishes, but this one I must agree with him, is the best so far. The top is perfectly crispy and the bottom is incredibly saucy. It's mixed, so there is plenty of seafood, greens, water chestnuts, chicken and char siu pork. It is so good it was covered in 'Street Eats', a local show featuring the best dishes around the city.

Mark's Selection: 
TBD I guess. Cher and Mark started dating a while back, but he's only started joining us for celebratory meals in the past year. This is his first time at Magic Wok, but he's familiar with the cuisine, so it's just a matter of time.


Other dishes we've had in not-so-regular rotation are Cashew Shrimp, Phoenix's Nest, Chicken Fried Rice, Crab, Chicken Hot Pot, and Chinese Broccoli.

Restaurant Info:
Magic Wok
4331 14th Avenue, Markham Ontario, L3R 0J2
(905) 305-6088
Urban Spoon Review


Saturday, November 3, 2012

Leftovers: Turkey Tetrazzini

When I was living at your grandparents, grandma would get creative with leftovers to the point that we never knew we were eating the same Thanksgiving  turkey every day. Something about this dish is so comforting. In the chill of mid-October, after a long day of school, especially if I had orchestra practice, it was one of those dinners that made you so happy to be home.

Since I've made it for both of you, this is the highlight of your Thanksgivings. You like seeing the bird, you like the Thanksgiving meal with family, but what you love eating is Turkey Tetrazzini. In fact, there was once a time when you both finished off the entire pot in two days!

As with most popular pasta dishes, Tetrazzini has an origin story. American, actually, circa 1910 from the Palace Hotel in San Francisco, where Italian opera star, Luisa Tetrazzini was 'a long-time resident' (according to Wikipedia). There are many versions of the dish, but to me, if it's not made with turkey, it's not worth making. Mom never would have made the original full fat version, so hers, while comforting, is also much healthier. 

Immediately after cooking. Also works with chicken.


Turkey Tetrazzini
Cooked Turkey
3 cups, coarsely shredded
Button Mushrooms
2 cups, quartered
Green Peas
1/3 cup
Broad Egg Noodles
1 pkg
Turkey Stock
2 cups
Water
0.5L, boiled
Sour Cream 
1/2 cup
All Purpose Flour
4 tbsp
Parmesan Cheese
1/4 cup (freshly grated)
Garlic
5 cloves, minced
Black Pepper
1 tbsp (ground)
Sea Salt
1 tsp
Canola Oil
2 tbsp
Parsley
for garnish


Preparation:
  1. Pour canola oil into pot on med-high heat
  2. Sauté garlic until translucent
  3. Add Button Mushrooms and saute until they brown and reduce in size
  4. Add flour and stir until flour is well mixed, translucent, and has begun to barely sizzle
  5. Add water slowly and whisk, adding only enough until the sauce has the consistency of thick béchamel 
  6. Whisk in turkey stock and black pepper
  7. Allow the sauce to comes to a boil
  8. Add shredded turkey, green peas to the sauce, stir, and reduce heat to low
  9. Prepare egg noodles, cook to slightly underdone, remove from heat (else they will just suck up all the sauce), and set aside until the sauce is finished
  10. Here is where you can add the egg noodles directly to the pot of sauce, or, if you prefer, plate the noodles and sauce on the plate - our family prefers the one pot sauced noodles (see picture)
  11. Stir in a dollop of sour cream immediately prior to serving, and garnish with parsley (or as you call it, Alistair, leaves)

Monday, October 29, 2012

Avocado Salsa

After Thanksgiving it felt great to have something light and refreshing. You would think this is a guacamole, but I am a guacamole purist, so since this is not strictly a guacamole, I liken it more to an avocado salsa. I also prefer chunky over smooth - this is not a dip or a sauce - guacamole and salsa are fresh and full of colour - let their ingredients be seen and the textures mingle. If I wanted a sauce, I would call this a sauce. I can't stand seeing people (and companies) mangle great ingredients.

The flavours are all very strong on their own, but they marry so well together that no one flavour dominates. You can serve this with tortilla's, but the picture here shows me eating it on a shredded wheat cracker. It's uses are limitless - a condiment for fish tacos would be my first dish to use this with.

No oil - all that creamy sheen is from the avocado and lime juice

I make this every time I have the ingredients on hand.


Avocado Salsa


Avocado
3, cubed
Tomato
5 med, chopped
Red Onion
1/2 head, minced
Garlic
2 tbsp, minced
Lime Zest
1 stalk, finely sliced
Lime Juice
5 whole peppers
Thai Chili
1/4 cup
Cilantro
1/2 cup
Black Pepper
2 tbsp (ground)
Sea Salt
4 tbsp (1/6 pkg)


Preparation:
  1. In a jar, add avocado cubes, diced tomato, garlic, lime zest, lime juice, chili paste, black pepper, sea salt.
  2. Cap the jar and shake vigorously.
  3. Let the jar stand while you prepare the cilantro. Once it has dried and been chopped, add it to the jar. It will seem as though it will not fit, but once it is coated with the salsa it will mix well. Adding it to an unmixed jar will hinder this process.
  4. Shake to coat all leaves. Open and stir up from the bottom if it needs some help to get going.
  5. Serve immediately, but the longer it steeps, the more flavour develops. Can be stored in the fridge for a little over a week (lime and salt are great preservatives).

Tuesday, October 9, 2012

Thanksgiving

Thanksgiving is usually at Roose's home, my mother's sister, and all of my mother's siblings, her cousin, and my nani attend. But this year my cousin Stephanie has moved and not been in her new house for more thank a week, and to get the first visit out of the way, we'll be having Thanksgiving there on Sunday. On top of that, mom wanted us to come by on Saturday, since Cheryl will not be able to make Sunday dinner. This will be a more intimate, immediate family, now that En and I are out west and Cher officially has Mark in her life.

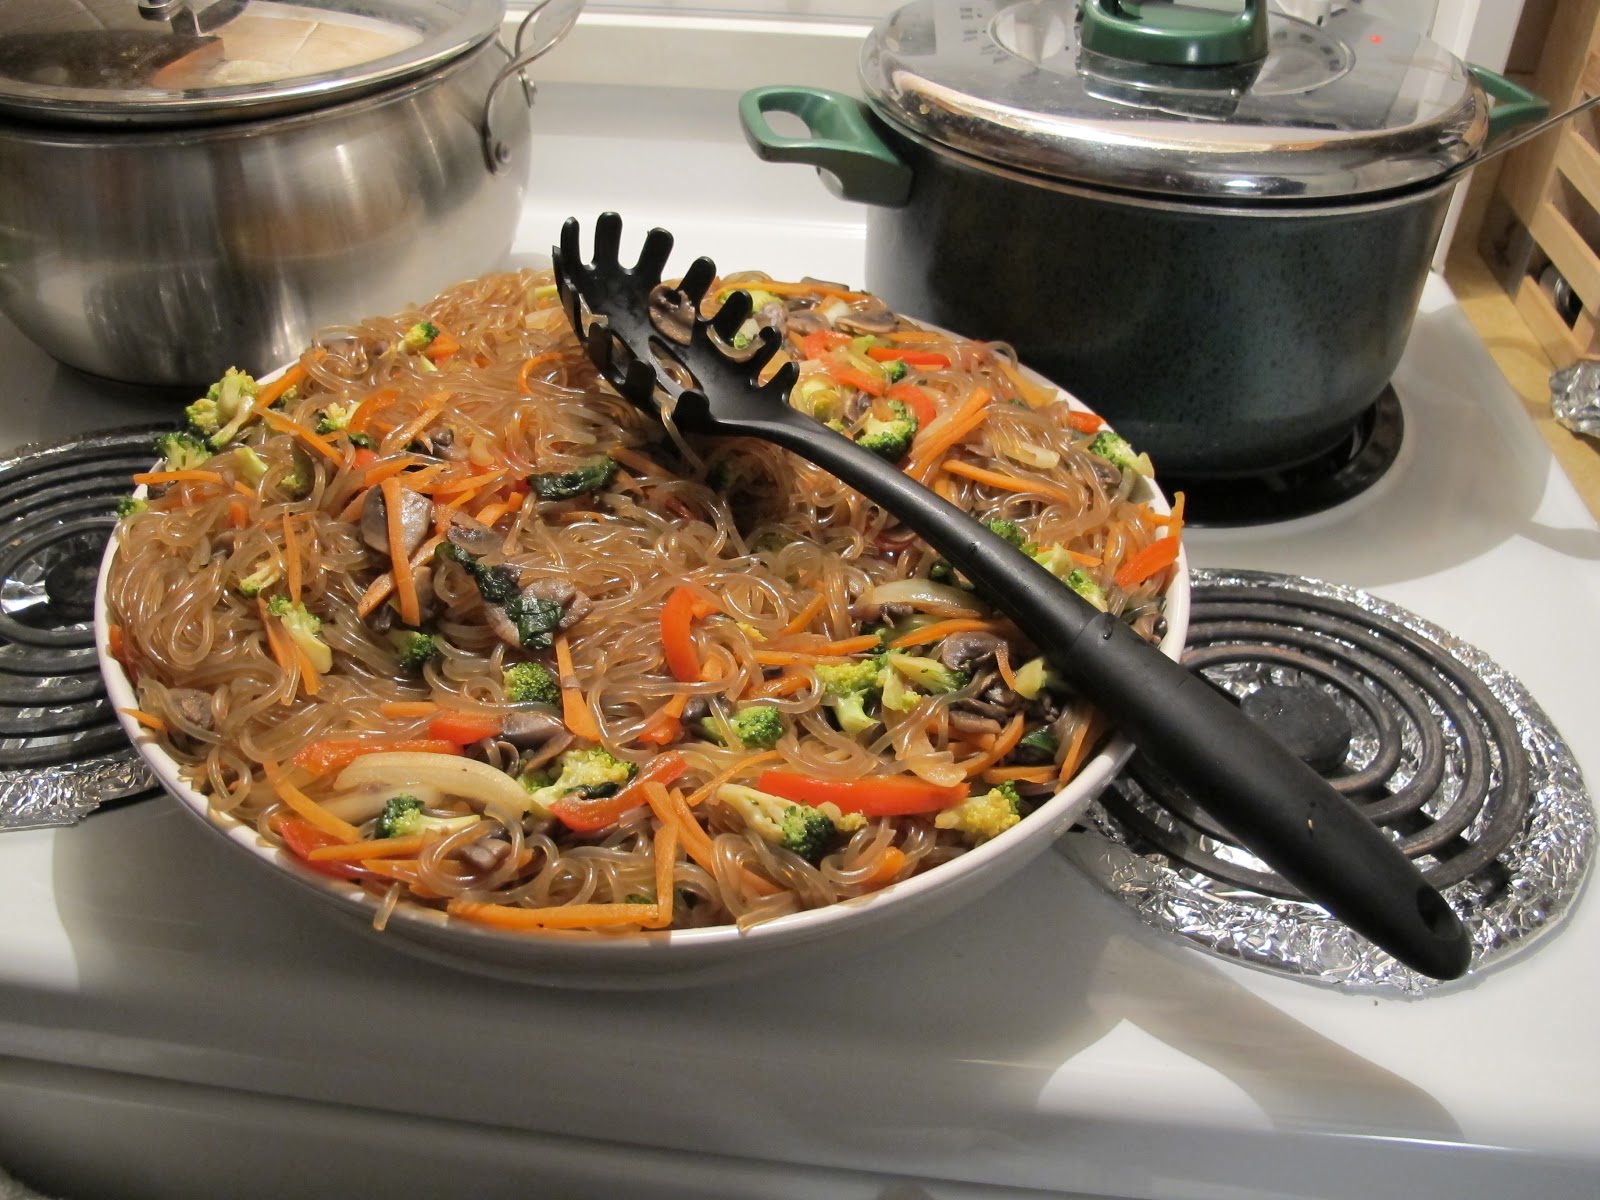
As if that wouldn't turkey us out enough, Monday En and I will be hosting his immediate family for 'take-out fake-out Chinese' dinner. Menu selection did not fall to me, obviously. I will insist we eat in the dining room. We need some tradition and civility for this holiday meal.

There have been the odd years where Thanksgiving has been held at my parent's home. Some years it would be just the four of us, some it would be the entire clan. This is the first year it's us with significant others, but the food remains the same. Here is the yummy menu I typically expect from mom, with the exception of one year, where we each had a Cornish hen stuffed with apricots and walnuts. Yum.
MOM'S THANKSGIVING MENU
Aparatif
Cognac
...and something Gin for me!
H'ors Douvres
Orange Cream Cheese Pinwheels
Mini Meat Tarts
Main
White Wine Whole Turkey
Gravy
Scalloped or Mashed Potatoes
Rice
Dessert
 Baked Something (Always Changes)
Fruit


If I had one word to describe Thanksgiving in the Persaud/Thakurdin/Sukhdeo/Brazinski family, it would be convivial. Not as much liquor as you would think. More food than you could shake a stick at. An odd and discombobulated menu that stems from our multiculturalism. While some would be confused, it works for us. Here is an almost unfailing sample menu.
THAKURDIN THANKSGIVING MENU
Aparatif
Grey Goose Vodka
Johnny Black
Virgin Punch
H'ors Douvres
Baigani, Palourie & Aluball with Tamarind Sour
Cream Cheese Crab Salsa Dip with Tortillas
Salted Plantain Chips (thick-long cut)
Main
 Lasagna (beef)
Turkey
Gravy
Roast Ham
Curry Chicken or Goat
Rice
Roti
Garden Salad
Dessert
Chocolate Cake
Almond Cake
Psuedo Cheesecake
Pone
Custard
Fruit

This is how things went down this year.
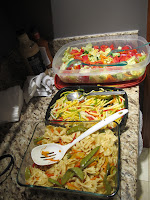
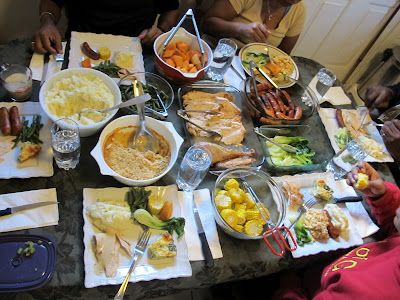
The Spread (clockwise from bottom): corn on cob, macaroni casarole, mash potatoes, green beans, sweet potato, sausage, bok choi and centre is turkey
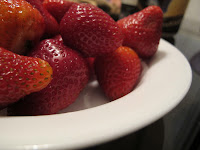
Fresh Strawberries

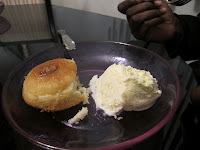
Pineapple Upside Down Individual Cakes
with Vanilla Ice Cream


On Saturday night I wanted to visit mom and dad, so mom had a dinner for us wish Cher, since she wouldn't be able to join to greater family dinner. Right off the bat there was h'ors d;ouvres; mutton rolls, samosas, hummus and pita, onion dip and triscuts. For dinner, there was turkey, gravy, mash potato, sweet potato, bok choi, sausages, macaroni casserole, and broccoli salad. For dessert, she served individual pineapple upside down cakes with vanilla ice cream. It was wonderful as always spending time at mom's. I was so tired I had to take a nap after dinner. Okay, I admit, there was some itis going on as well, but for the most part, sleeping three hours a night for a couple nights will do that to you. To see Alexis so comfortable with everyone just warms my heart so much. It always feels like home.


The yummy salads I missed :(
Dinner - The table extends beyond that top right plate

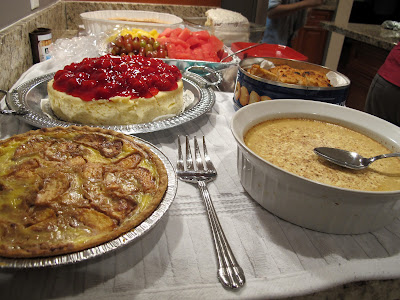
Dessert: check out that cheesecake!
Sunday Dinner at Steph's new house was wonderful and I didn't over eat like I did the night before. There was turkey, gravy, mash potatoes, pasta salad and mango salad, rice, dhal pourri, chicken curry, mutton curry, phalourri, potato ball with mango sour, spring rolls and lumpia, veggies and dip, crab dip. For dessert, there was pumpkin pie, cheesecake, some cookie dough cake, pone, custard, and a few other things I'm sure. I didn't eat much  (I missed to mango salad!) because Alexis was upset with her food. I had to cut up and mash her green beans and sweet potato there, so it was way too chunky. It took four of us to feed her! That's okay; I didn't want to overdo it anyways. It was simply nice to see my family and chat with them all, but also was wonderful seeing my cousin's new home. Food was simply a bonus. Aunt Mala made the Cheesecake. which was the only dessert I indulged in. And damn, she said she twice baked it, and damn, was it ever good.
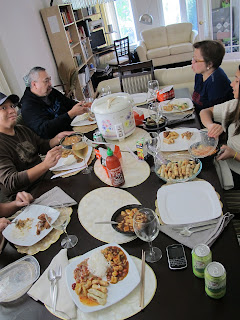

Chowing Down
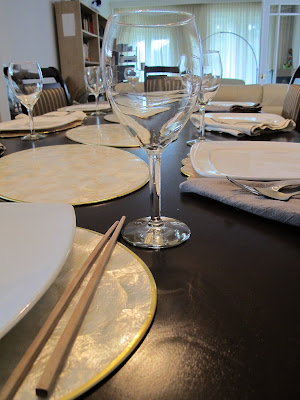
Beautiful Table Set by Kayla

Monday Lunch was here at our house. The Teopiz family got together here sans Jeverlynn, since she was horribly sick. We really missed her. The menu for the Teopiz clan is never really home made.  They ordered from China China Palace to augment the few things we made. I made a ton of lumpia, cut up some guava and longuns, and ma brought a fruit tray, lumpia, steamed rice, fried plantain and a big black forest cake. The meal was Shrimp in Lobster Sauce, Ma Po Tofu, Seafood Cantonese Chow Mien, Beef in Black Bean Sauce, Pad Thai, Fried Calamari and Fried Chicken Wings.  I set the dining room table, and for the first time in what must be years, his family sat in a home at a table, together, and ate a holiday meal. I was so happy. It felt right. After dinner and coffee, the guys retired to the basement and we stayed in the kitchen to feed Alexis.

Tuesday, September 18, 2012

Red Thai Curry Beef

Quick shot of my bowl
It was another rainy day and I wanted to make something hearty. I didn't want anything tomato based. I wanted something saucy. And I didn't really know what I was going to make until I took the meat out of the fridge. And even then, I had an idea of what I was going to make, but not exactly how I was going to make it.

This is not exactly a textbook Thai Red Curry, but it borrows the flavours that make this dish work. I made some substitutions based on what I had on hand (read: what I could use in a pinch instead of searching while my daughter grows increasingly impatient) and the results turned out so yummy with a great texture, that honestly, there isn't a thing I would change.
Shot of the pot right before we dished in.


Red Thai Beef Curry


Stewing Beef
1 lb
Onions
5 med, chopped
Garlic
1/2 head, minced
Ginger
2 tbsp, minced
Lemongrass
1 stalk, finely sliced
Thai Chillis
5 whole peppers
Non-Fat Sour Cream
1/4 cup
Non-Fat Yoghurt
1/2 cup
Crab Paste
2 tbsp (ground)
Tamarind Paste
4 tbsp (1/6 pkg)
Tomato Paste
2 tbsp
Fish Sauce
1/4 cup
Khaffir Lime Leaves
5 leaves
Curry Powder
2 tbsp
Coriander
1 tsp (ground)
Black Pepper
1 tbsp (optional)
Canola Oil
4 tbsp


Preparation:
  1. Wash beef and cut into 1" cubes
  2. Pour canola oil into pot on med-high heat
  3. Saute onions and garlic until translucent
  4. Add ginger and lemongrass and saute until barely beginning to brown
  5. Add tomato paste, crab paste, curry powder and coriander
  6. Cook out all moisture until the paste begins to fry
  7. Add beef and stir to coat and then leave to brown
  8. Juices will release. It will seem like a lot of liquid, but rest assured, it will all evaporate. It will take a long time and require occasional stirring, but do not skip this step and do not continue before the meat itself begins to fry after all the liquid has disappeared. Doing so will result in a bland, one note dish. This is the step that separates the 'holy-crap-this-is-amazing' from 'it's-nice'.
  9. When the meat has caramelized, add lime leafs, chillies and enough just-boiled water to cover and stir.
  10. In a separate bowl, add tamarind paste and pour enough boiling water over to cover. Use a fork to quickly and vigorously mash the paste until all the pulp has been removed from the seeds and the skins. If you use 'sweet-tamarind', you will get a crappy taste. What you're looking for here is the intense sour of tamarind paste. Do not substitute this. Once you've mashed the paste, your water will become a pulp. Strain this through a fine meshed sieve directly into the pot.
  11. Add fish sauce to the pot.
  12. Stir and let boil for ten minutes.
  13. Add yogurt and sour cream and stir to completely incorporate. The yogurt may appear a little grainy - that's okay. It will completely dissolve by the time the dish has finished cooking.
  14. Reduce heat to low and cover for fifteen minutes. Turn off heat and remain covered until ready to serve over steamed rice.

Monday, April 23, 2012

Caramelized Onion Tart with Lemon Zest and Thyme

I had my aunt Vijai, uncle Chico and cousin Randy over as they were eager to visit with Alexis. I always enjoy their visits, but this was even more special because it was all about my little angel. Mom cooked up a storm and wouldn't hear another word about it from me, but I wanted to contribute something, so I made an onion tart. I've done this before but more in a bite size portion, not in an 8" dish, but I did it and it turned out wonderfully. At dinner I had to preface that it was not a sweet tart, but Randy still expected it to taste like desert! It's an appetizer tart, it just didn't get to the table before the food, lol. I still love you Randy.

I forgot to take a picture before everyone had a slice, but this pic shows a great cross section!


Caramelized Onion Tart
_________________________________

Pastry:


Flour
2 cups
Butter (I use margarine)
10 tbsp
Ice Water
1/4 cup
Rosemary
1 tsp (coarsely ground)
Sea Salt
1 1/2 tsp (ground)
Black Pepper
1 tsp (ground)


Filling:

Onions (large)
10
Margarine
1/4 cup
Lemon Zest
from one lemon
Thyme
3 tbsp, dried
Sea Salt
1 tsp
Black Pepper
1 tsp
Sour Cream
1/4 cup


Oven and Pans:
  1. Preheat oven to 350F.
  2. In an 8" pie dish, place a circle of parchment paper with the edges extended beyond the dish. This will allow for easy removal once the tart has cooled.
Preparation - Pastry Dough:
  1. In a working bowl of a food processor, add flour, salt, pepper and rosemary.
  2. Process to combine all dry ingredients.
  3. Remove margarine from freezer and cut cubes into the flour mixture.
  4. Process until mixture becomes course (think sandy). Shouldn't take more than a few pulses.
  5. Add a few tablespoons of the ice water. It will be difficult to process after this and you don't want to overwork the dough, so try to judge how much you need to barely bring the dough together. You likely will not use all the water.
  6. Empty dough and wrap into a ball with clingfilm. I empty the dough right onto the cling film and ball up from there, for minimal handling.
Preparation - Filling:
  1. Slice onions lengthwise in quarter inch thickness.
  2. In a pan, melt margarine on medium heat.
  3. Add onions, stir often being sure to not let the onions brown.
  4. Once they become translucent, reduce heat to medium low and stir only to avoid frying.
  5. Cook down until onions have wilted dramatically and colour has darkened to half the desired shade.
  6. Add black pepper, lemon zest, thyme and salt. Salt earlier would have brought out the moisture of the onion, and that would have increased the time required to begin caramelization.
  7.  Continue cooking and stirring until onions have turned a golden brown and have developed the required sweetness.
  8. Cool. The filling can be made in advance and stored in an airtight container in the fridge until ready to make the pie. Just bring all ingredients to room temperature prior to baking.
Preparation - Tart:
  1. Preheat oven to 350F.
  2. Use as little bench flour as possible and place dough on the board, pressing down the ball until it is a somewhat flattened circle. I leave the cling wrap on top of the pastry. This makes it easy to press without my hands touching the pastry and easy to roll without the pastry sticking to the rolling pin.
  3. Roll out the pastry to approximately a 9" diameter and at least 1/4" thickness.
  4. Lift the pastry and centre over parchment lined pie dish and roll into place.
  5. Press into corners, pinch the edges, and use a fork to pierce the dough for venting (to prevent any air pockets and deformation).
  6. Blind bake the tart shell for 20 minutes.
  7. Remove tart shell and spread a thin layer of sour cream.
  8. Drop onion mixture and use a fork to drag the strands to cover the tart bottom without disrupting the sour cream layer.
  9. Bake for 30-35 minutes or until crust and onion peaks start to brown.


Friday, April 6, 2012

Taking Brunch in the Solarium on Good Friday


We were chatting, it was a warm morning and it just felt relaxing to brunch in the solarium for the first time since moving into the house.


Monday, April 2, 2012

Tuna Wraps

It's one of those rainy mornings where the cold is bone chilling. You want something comfortable to eat. Usually I'd go to fries and hot dogs, soup and sandwich, grilled cheese, toast and tea... but I digress. Yesterday morning was as I described above and I just woke up feeling that tuna salad was what we needed.

I have a simple basic recipe that really works. Again, the key is the accompaniments to the tuna - you can have it creamy and tasty, yet you can do it so that it's not a whole heap of fat or calories.

People knock the low fat or no fat options at the grocery store, but you shouldn't rely on fat for flavour. That's what freshly ground spices and herbs are for. I use low-fat mayo and non-fat sour cream for texture, and for seasoning, use a fresh garlic clove, freshly ground black pepper, and green onions. For lunch sandwiches, I prefer tuna salad cold, but for these breakfast wraps, we added a slice of 'non-fat Kraft sliced cheese' and toasted it in the oven. Out of everything on the list of ingredients, this is the one that everyone seems to hate, yet it flies off the shelf. Someone's buying all this cheese besides me! Chef's hate it because it's processed garbage, and generally it's seen as the simulated oil based non-dairy product. But the Nutrition Data website tells the truth about it - it's actually a decent product that just has a bad reputation. And honestly, nothing gets all melty-gooey like sliced cheese. That's what makes it 'comfort' - it takes you back to your childhood. Just great yummy, unpretentious food. If it makes my family (any myself) happy, that's all that matters.


Tuna Wraps
_________________________________

Tuna Filling:


Canned/Vacupacked Tuna, drained
4 cans
Low-Fat Mayonnaise
1/2 cup
Non-Fat Sour Cream
2 tbsp, heaped
Celery
1 stalk, finely chopped
Green Onion
3 stalks
Garlic
1 clove, finely minced
Worcestershire
1 tbsp
Tabasco
1/2 tsp
Celery Seed
1/2 tsp (ground)
Sea Salt
1 tsp (ground)
Black Pepper
1 tsp (ground)
Lemon Juice
1 tbsp (optional)


Wraps:


Small Whole Wheat Wraps
8
Sliced Cheese
8


Preparation:
  1. In a medium bowl, add strained tuna, celery, green onion and garlic and mix well.
  2. Stir in sour cream until fully incorporated.
  3. Add mayonnaise and make a divot to pool the seasoning before mixing into the tuna.
  4. Add ground celery seed, ground black pepper, Worcestershire, Tabasco, salt and mix into the mayonnaise.
  5. Stir entire mixture together until fully incorporated.
  6. Set oven to 350F (I use a toaster oven).
  7. I place two dollops in the centre of a wrap and spread out to fill the middle third.
  8. Place cheese slice atop the tuna filling.
  9.  Fold in sides of the wrap and hold fast with a toothpick. Lift the wrap a little to ensure the toothpick pierces through the bottom - it holds better this way.
  10. Bake for 10 minutes. each person is served two wraps. This preparation serves four people.

Friday, March 30, 2012

Riccota and Spinach Stuffed Cannelloni

These days I tailor my dinners around what's on sale at the grocery store. Don't get me wrong my Sunshine, but taking care of you (Alexis) and trying to come up with a meal, the mortgage strapping our budget, and me on maternity leave, being cost effective as well as saving on time and labour makes meal preparation a living hell. So I saw a few things on sale and decided I would try this cannelloni. You're right; it's not a quick dish you whip up, but if you do things in steps, you can bring it all together before you're ready to cook.

Alexis, you are a handful, and I can't plan anything that takes longer than fifteen minutes before I have to tend to you in some way. So in choosing what I make this family for dinner, I need to be aware of your needs. Cleaning chicken? Not really a great option unless I'm using legs or breasts - less cleaning. So with this cannelloni, no meat preparation and all done in steps.

Ricotta Spinach Filling


Stuffed and Arranged in Trays
What was on sale? Spinach. Ricotta was still pricey, but you don't need a lot. And I had most of the other ingredients at home. Your spices and herbs make all the difference as well. How did I manage in steps? I prepared the filling the day before. Brought all the pantry ingredients to the kitchen ready for a mad dash to complete as much as I could. I use 'oven ready' pasta which makes all the difference when you're not able to give them your full attention and risk their splitting as you fill them, and just soaking them in a large bowl of cold water is a great prep before baking. I prepped the baking dish. I used a pastry piping bag to fill the cannelloni. I used a canned (gasp) sauce instead of homemade. Come on, when you have a baby to take care of, shortcuts are acceptable. You're not wonder woman, so don't try to bite off more than you can chew. Mom taught me that. Then again, she can whip up a delicious feast in a few hours and make it look like child's play. If she's willing to use shortcuts, who am I to argue?
2 Cans of Sauce
1 Can of Sauce

The most time intensive preparation is stuffing the cannelloni, and as long as you have enough sauce to cover, the rest is super easy. I thought I could get away with one can, but as you can see, it would have been a disaster. The pasta would have dried to a gummy crisp.
Baked - You could see the sour cream holds where the sauce cracks and allows it to become thick and sweet.

I have to admit, when Kayla saw what we were having for dinner she was super excited. I haven't seen her that excited in quite a while. Everyone went back for seconds. Between the three of us, we finished the first tray. I guess this recipe is a keeper.

You just have to trust me when I say this plate contains three cannelloni.


Ricotta Spinach Filling:
1 Tub Riccotta
4 pkgs Frozen Spinach
1/4 cup Parmesan
1 Egg
1/2 tsp Nutmeg
1 tsp Black Pepper (freshly ground)
1 tsp Sea Salt (freshly ground)

Cannelloni:
2 pkgs Cannelloni
2 cans Tomato Sauce
1 cup Sour Cream
5 Garlic Cloves
2 tbsp Oregano
1 tsp Sea Salt
1 tsp Black Pepper (freshly ground)
4 tbsp Olive Oil


Directions (Ricotta Spinach Filling):
Thaw spinach and strain all water.
In a bowl, mix spinach, nutmeg, black pepper and sea salt.
Add ricotta and grated Parmesan and mix well.
Make a well in the middle of the mixture and add the whole egg.
Beat the egg and then incorporate into the mixture.
Refrigerate until required (I did the mixture two days in advance).
When ready to stuff pasta, spoon mixture into a pastry bag with no nozzle attached.

Directions (Cannelloni):
Preheat oven to 350`F.
Fill a big bowl with cold water and soak the cannelloni noodles.
Grease two trays with olive oil.
Spoon enough tomato sauce to coat the trays.
Using the pastry bag, pipe gently into one end of a horizontal cannelloni, making sure your palm covers the other opening. Do not press bag into pasta - this will break the cannelloni.
Place the pasta into the tray.
Repeat this until all cannelloni have been stuffed and they are close (but not touching) in the tray.
Mix sour cream and minced garlic.
Coat the top and sides of all pasta with the sour cream mixture.
Sprinkle trays with salt, pepper and oregano.
Top all pasta with tomato sauce. I add about a half cup of water to each tray to make sure the sauce will get into each little nook to ensures a moist and saucy pasta.
Bake uncovered for 45 minutes.
Turn off the oven and leave it without opening the door until ready to serve.


Copyright 2009 Lime & Wine. Powered by Blogger Blogger Templates create by Deluxe Templates. WP by Masterplan